


Online Rendition Processing
Introduction
After creating Business account, County Assessor’s office will generate and send rendition notice to Owners which is an empty form. Then Owners should submit the rendition notice which includes all the information about the assets like Date of Acquisition, cost, Type and description of the Assets used in the business. Owner can submit the rendition notice through online or offline.
If the rendition comes through online, key no. or pin no. will be sent to customer. Then customer will access county portal using account no. and pin no. and fill the rendition form with the respective details. Online rendition notice contains Base line items and Filed items. Base line items include the items which are already existed in last year whereas Filed items shows the items which are added in the current year.
Generally, county will send rendition notices for the business which is established on or before October 1st. Once the rendition notice was sent, Owner should submit the rendition form through online by end of March. Once the user files the rendition notice, then Valuation notice will be sent to the respective owner. If the rendition notice was not sent by the owner with in the dead line, then owner will be penalized with 10 % of final assessed value and late assessment fee of $5 and delinquent fee.
If the owner failed to pay the taxes, then the county will Bring forward the previous year item values (market values) to next tax year and apply taxes without considering depreciation (which results in higher taxes). If it is a new business, County will use grid approach on which tax is calculated based on sqft value of the land. Owner should pay higher taxes than regular taxes if the county goes through Grid approach.
This document will guide the user through filing online rendition, adding and updating items, completing online rendition.
Workflow
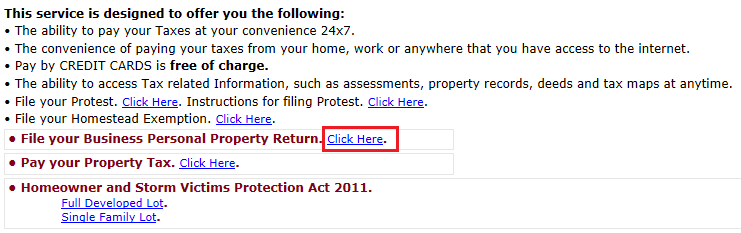
Go to the Citizen Access Portal
Click on the hyperlink next to “File your Business Personal Property Rendition”
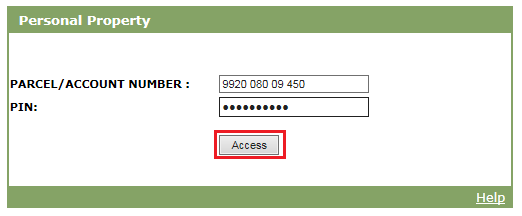
Enter Account Number and Pin, click on Access.
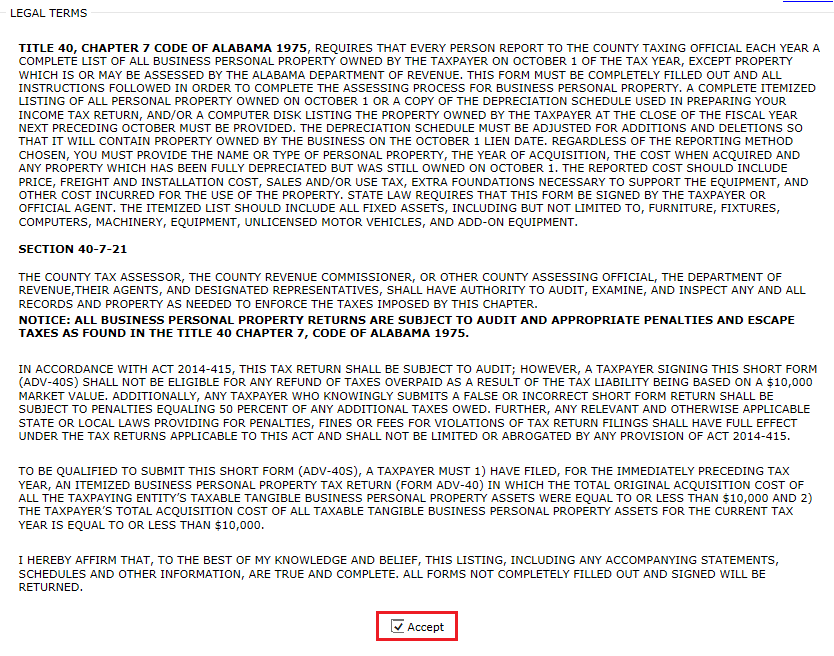
Agree to the Legal terms by checking Accept.
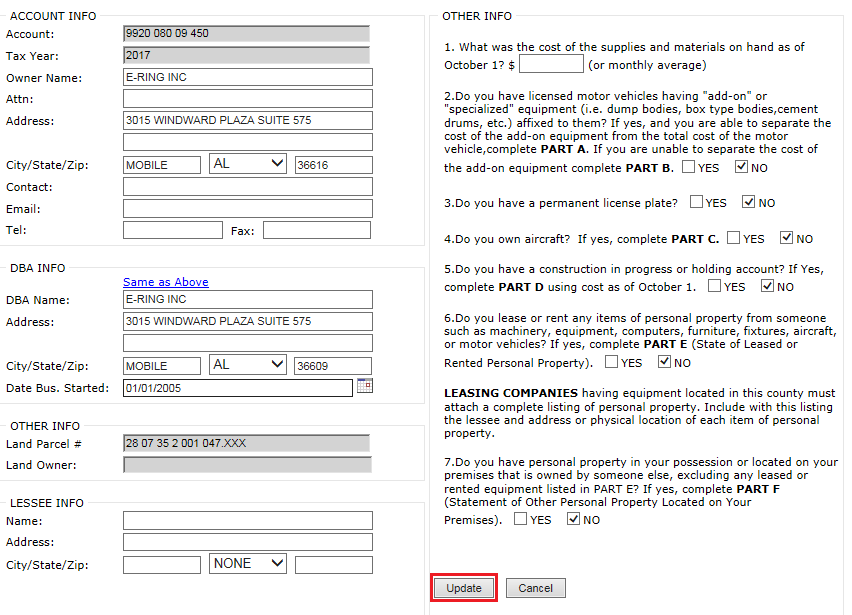
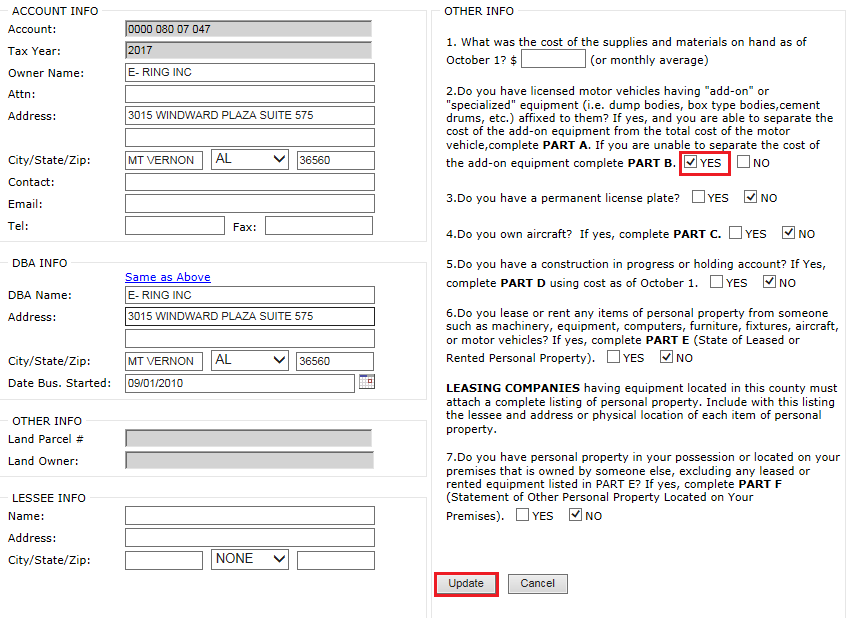
Update any Business Information, General Information, DBA Information, Owner Information and click on Update.
The user can mark the business information as Closed (to close the business) or Moved (to move the business to other location).

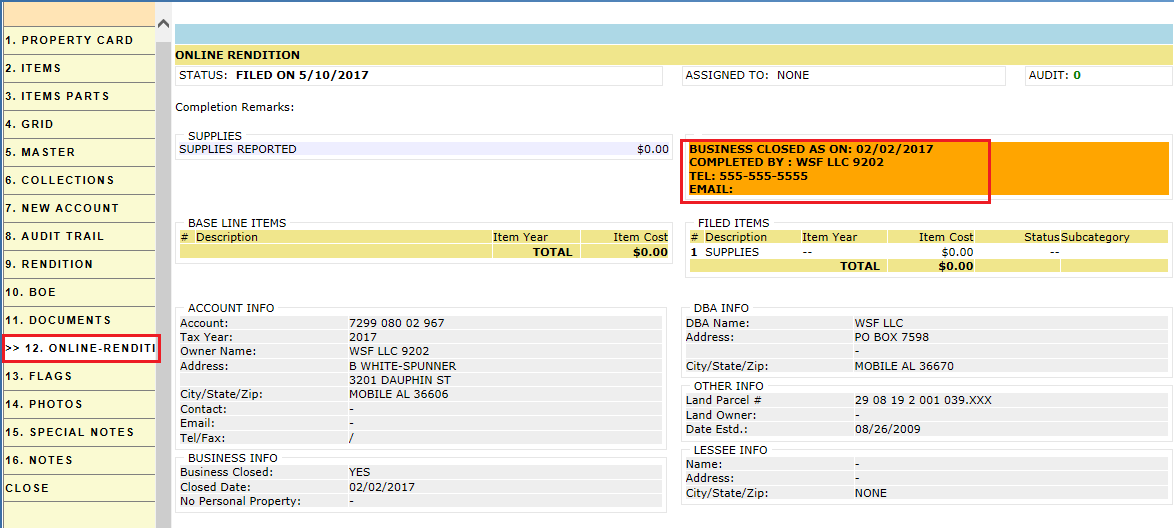
If user check marking the business to close, mention the closed date and click on Apply.

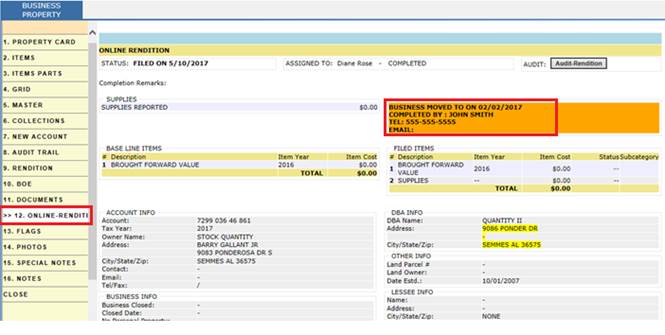
If user check marking the business to Move, mention the moved date and Moved to information then click on Apply.

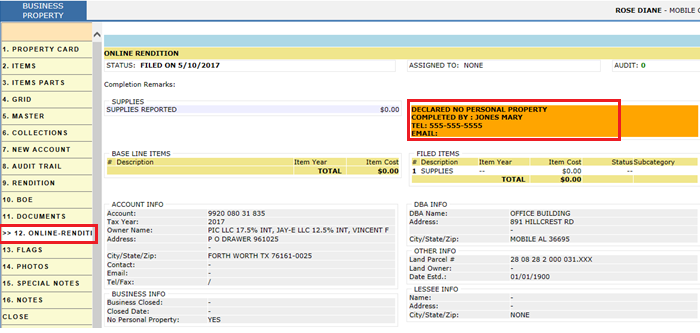
If there is No Personal Property, user can mark the check box to indicate that there is no personal property.

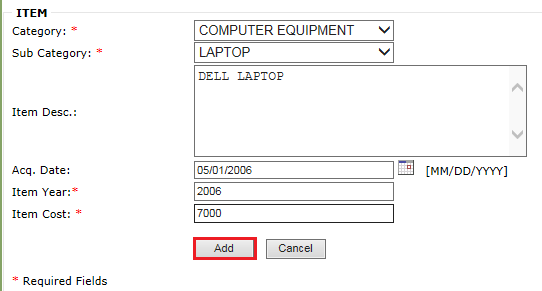
Click on Add Item or Delete Item at the top of the page to add or delete any items.

After clicking on Add Item hyperlink, fill the respective info and click on Add. Then the status of the item becomes NEW.
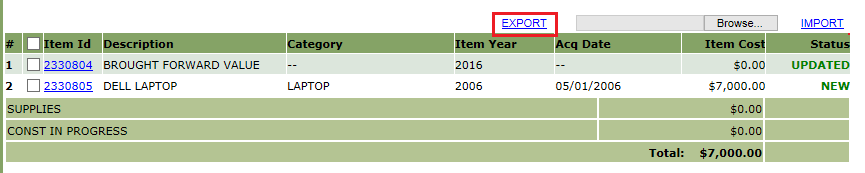
Click on the Item Id hyperlink to update any items.

After making respective changes, click on Update. Then status of the item becomes UPDATE.

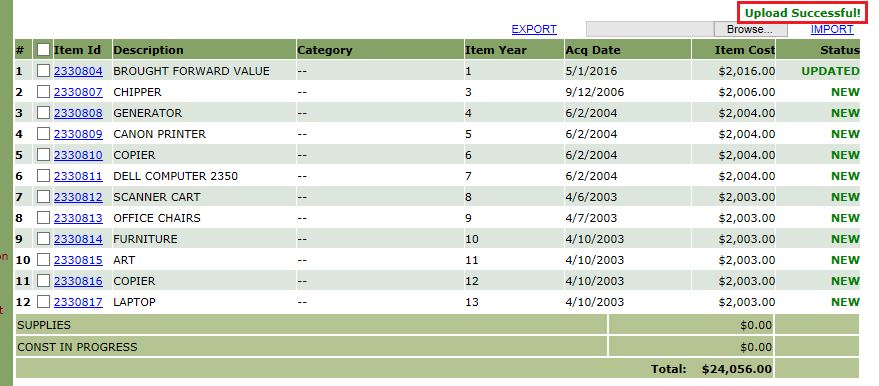
Note: The user can also upload the items list by exporting the items list, make changes and import back into the system.
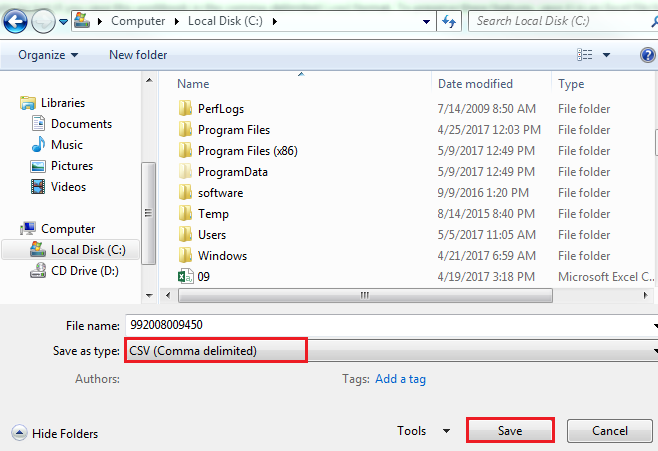
To use the Export feature to update, delete, or add items, click on Export, make changes and save the file as .csv extension to a specific location.
On Citizen Access Portal, click on Browse button to locate the .csv file and click on Import button.
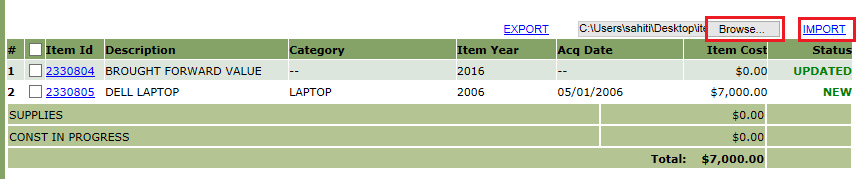
If import was successful, it will show Upload Successful.
If the user checkmark Yes for no. 2 i.e., PART B, then the user will complete the respective parts.
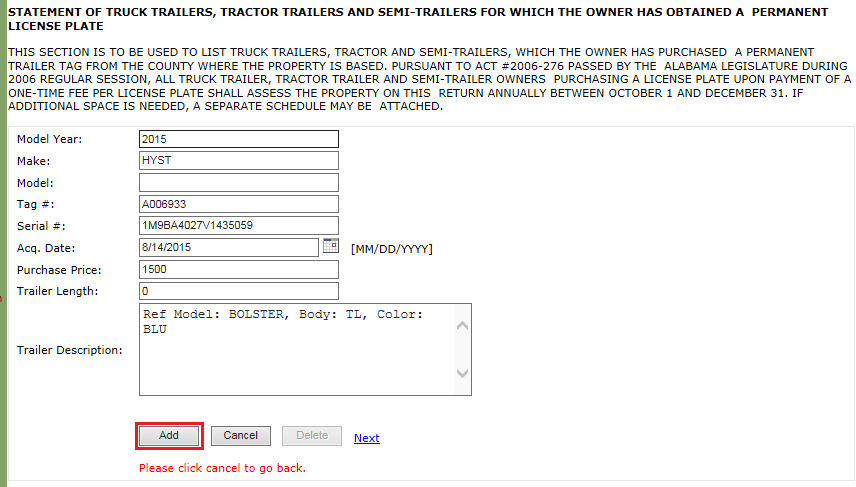
If any items need to be added, click on the Add hyperlink.
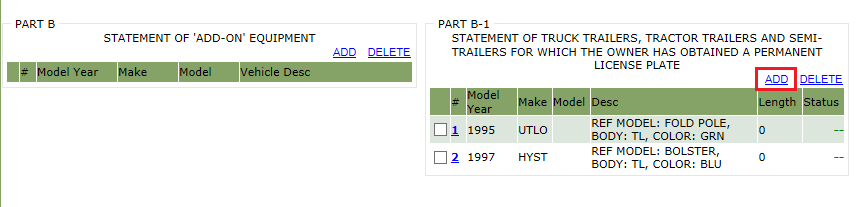
Enter respective information and click on Add.
To delete any item, checkmark item and click on Delete. After deleting, status of the item will become “DELETED’
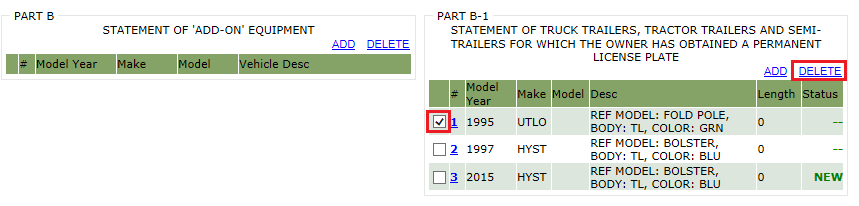
Continue above process until all necessary Parts have been added.
After adding all the items, click on Complete Rendition link.

Here, check mark “I hereby affirm” box and click on continue.

Enter the items marked as [Mandatory] and click on Complete.
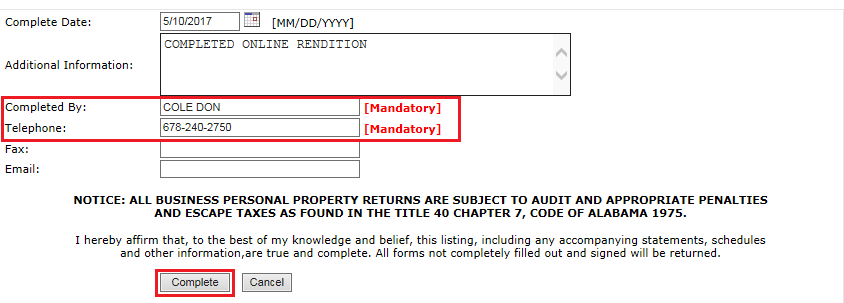
Then Click OK to get confirmation through mail or text message or call.
Completing Online Rendition
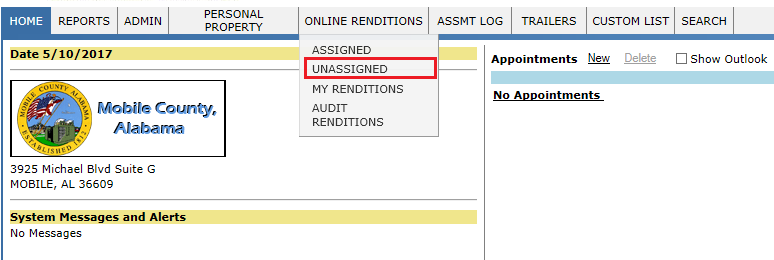
To complete the Online rendition in Capture, Login as privileged user (PP Supervisor/ user) who can assign renditions.
Hover over ONLINE RENDITIONS and click on UNASSIGNED
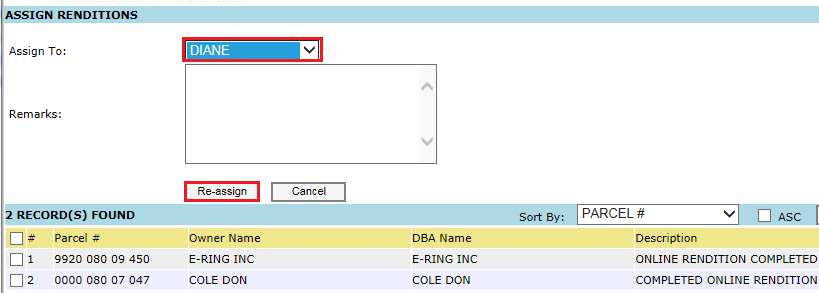
Choose the Tax Year, Type and Date filter accordingly and click on Go.

Check mark the case and click on Assign.

Select the user from the Assign To drop-down, enter any remarks if necessary and click on Re-assign.
Login as respective user to whom the renditions were assigned.
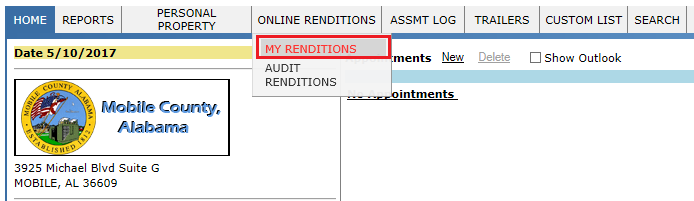
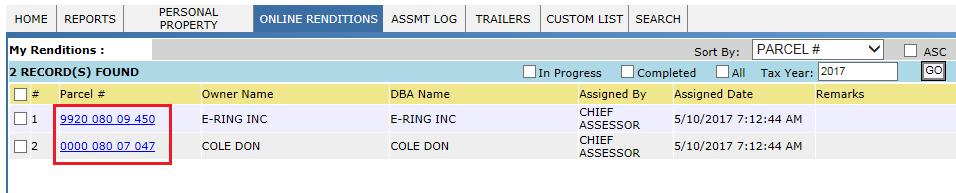
Hover over Online Renditions and click on My Renditions.
Click on Account Link will open Business personal property dashboard.
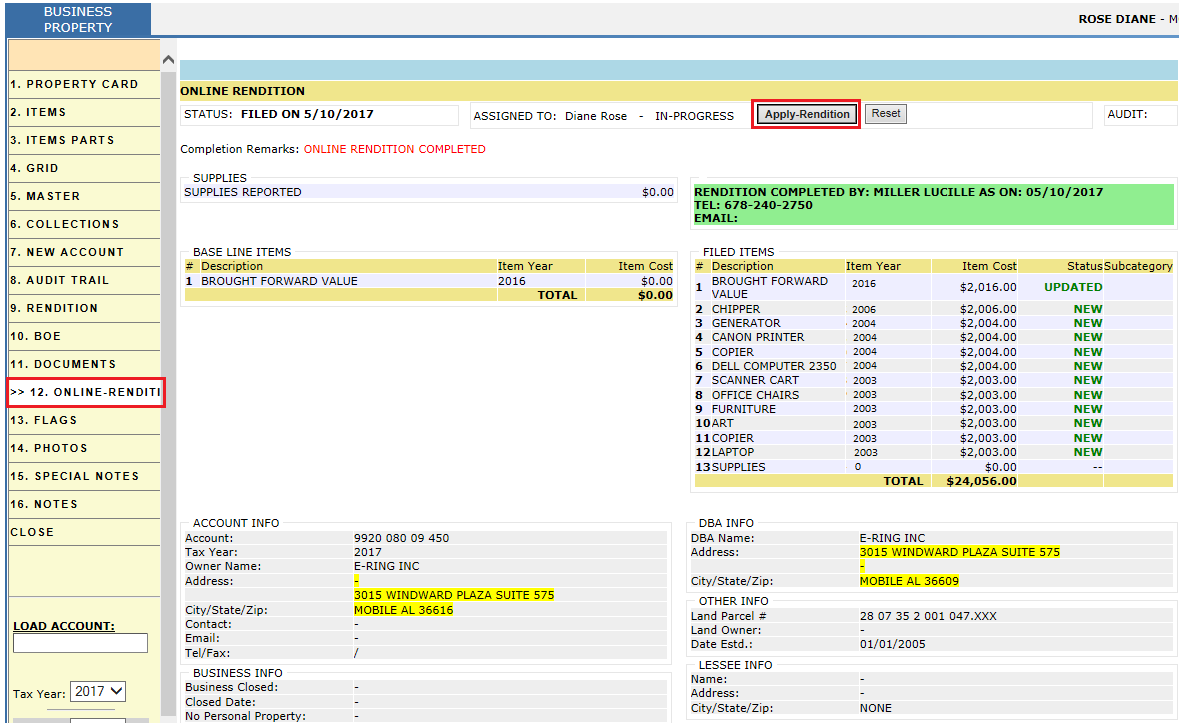
Click on Online – Rendition and then Click Apply – Rendition button if all the information is correct.
Verification
Click the Items tab to view the updated information.
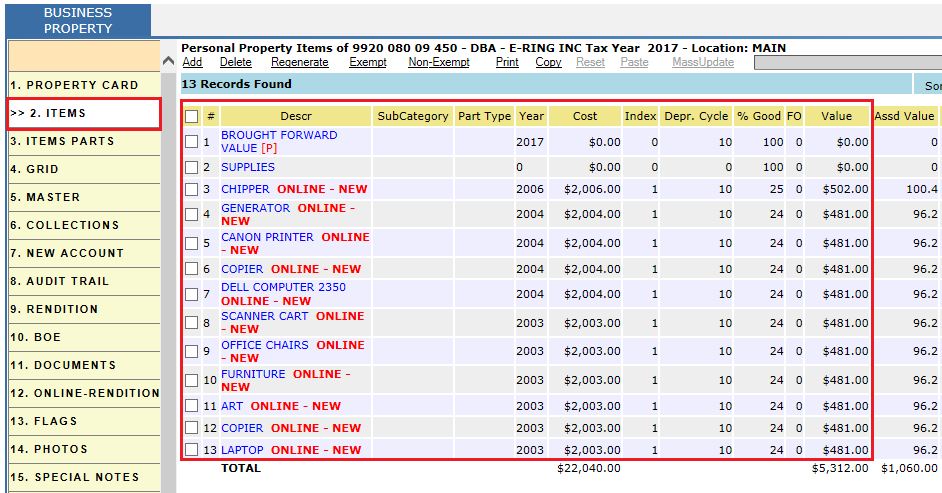
Note: If the item doesn’t contain any value initially, select the record and click on Regenerate link to generate values.
Verify Property Card after applying rendition. Here rendition status will become RECEIVED.
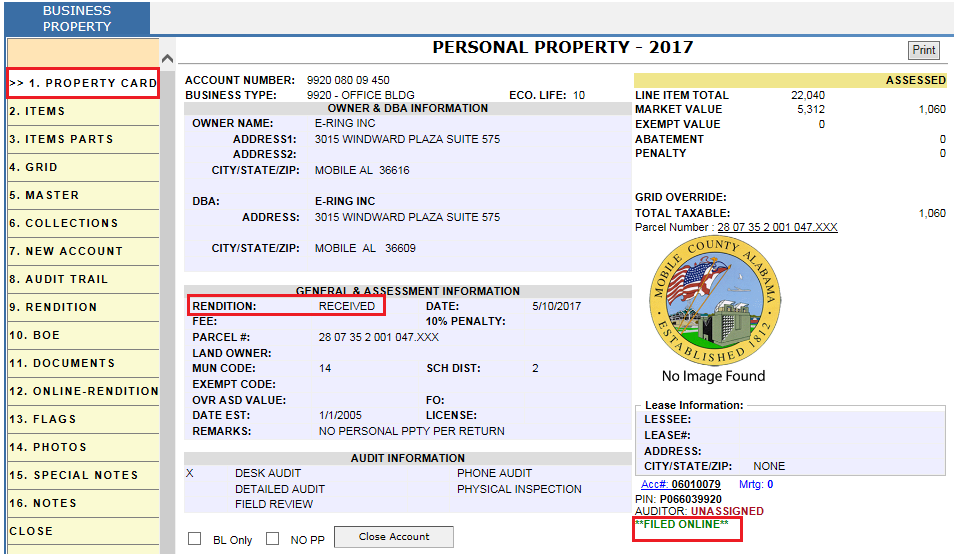
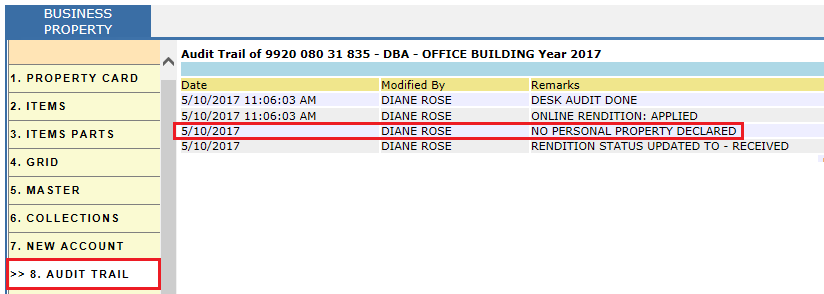
If the user mark the checkbox for NO PP in Access Portal then after applying rendition, that respective information will be shown under ONLINE- RENDITION tab of Account.
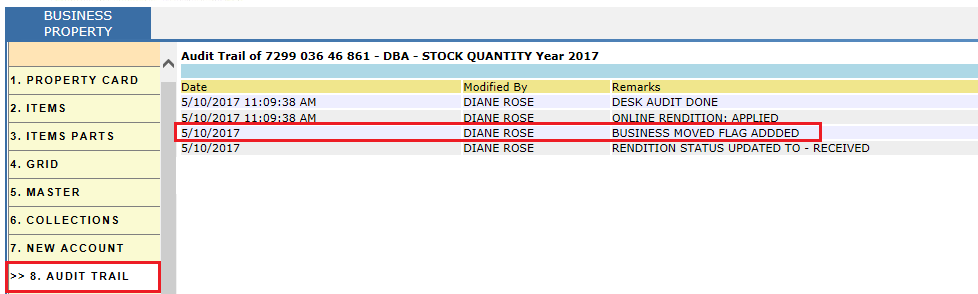
If the user mark the checkbox for business as Moved in Access Portal then after applying rendition, that respective information will be shown under ONLINE- RENDITION tab of Account.
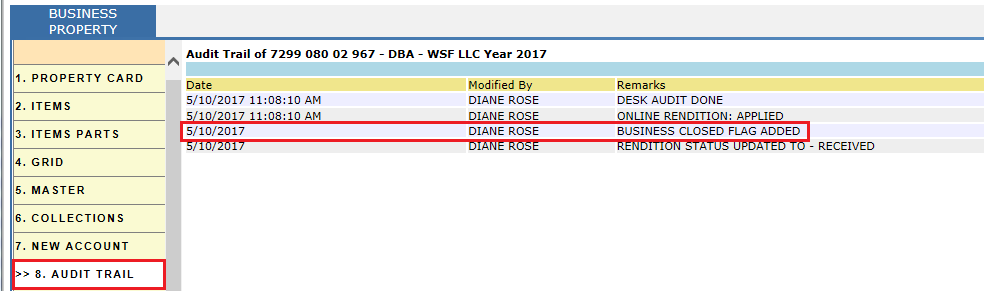
If the user mark the checkbox for business Closed in Access Portal then after applying rendition, that respective information will be shown under ONLINE- RENDITION tab of Account.
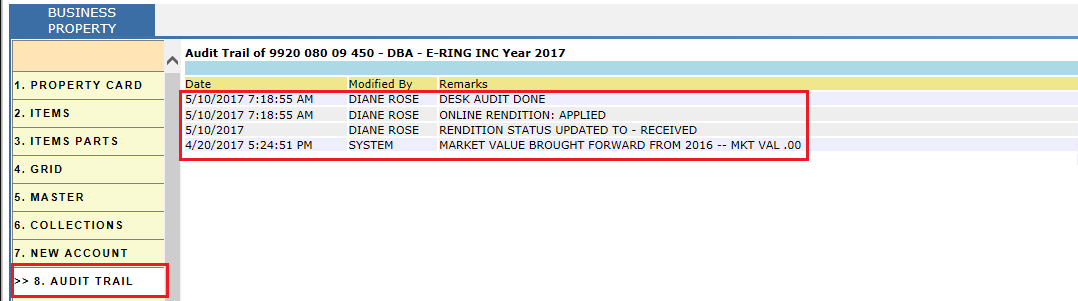
Audit Trail
Before filing online rendition for this account, the market value has Brought Forward from previous year. That information will be available on Account audit trail. Once the user apply rendition to account, then that respective information will be shown. Once the online rendition applied, Desk audit will be done and that information will be audited.
If the user mark the checkbox for business as CLOSED in Access Portal then after applying rendition, that respective information will be shown under AUDIT TRAIL.
If the user mark the checkbox for NO PP in Access Portal then after applying rendition, that respective information will be shown under AUDIT TRAIL.
If the user mark the checkbox for business as MOVED in Access Portal then after applying rendition, that respective information will be shown under AUDIT TRAIL.

Confidential | Copyright © 2017 E-Ring, Inc.